

Your first parser in five steps
You have copied logs from a product. You do not know the log format. That is enough to start. Goal: Analyze two fictional events, review the extracted values, check their field names, and reach the parser file download step.Step 1 — Open Auto Parser
Open Parser Studio and choose Auto Parser in the left menu. You should see these four stages at the top: Add Logs, Review Fields, Map Fields, and Create Parser.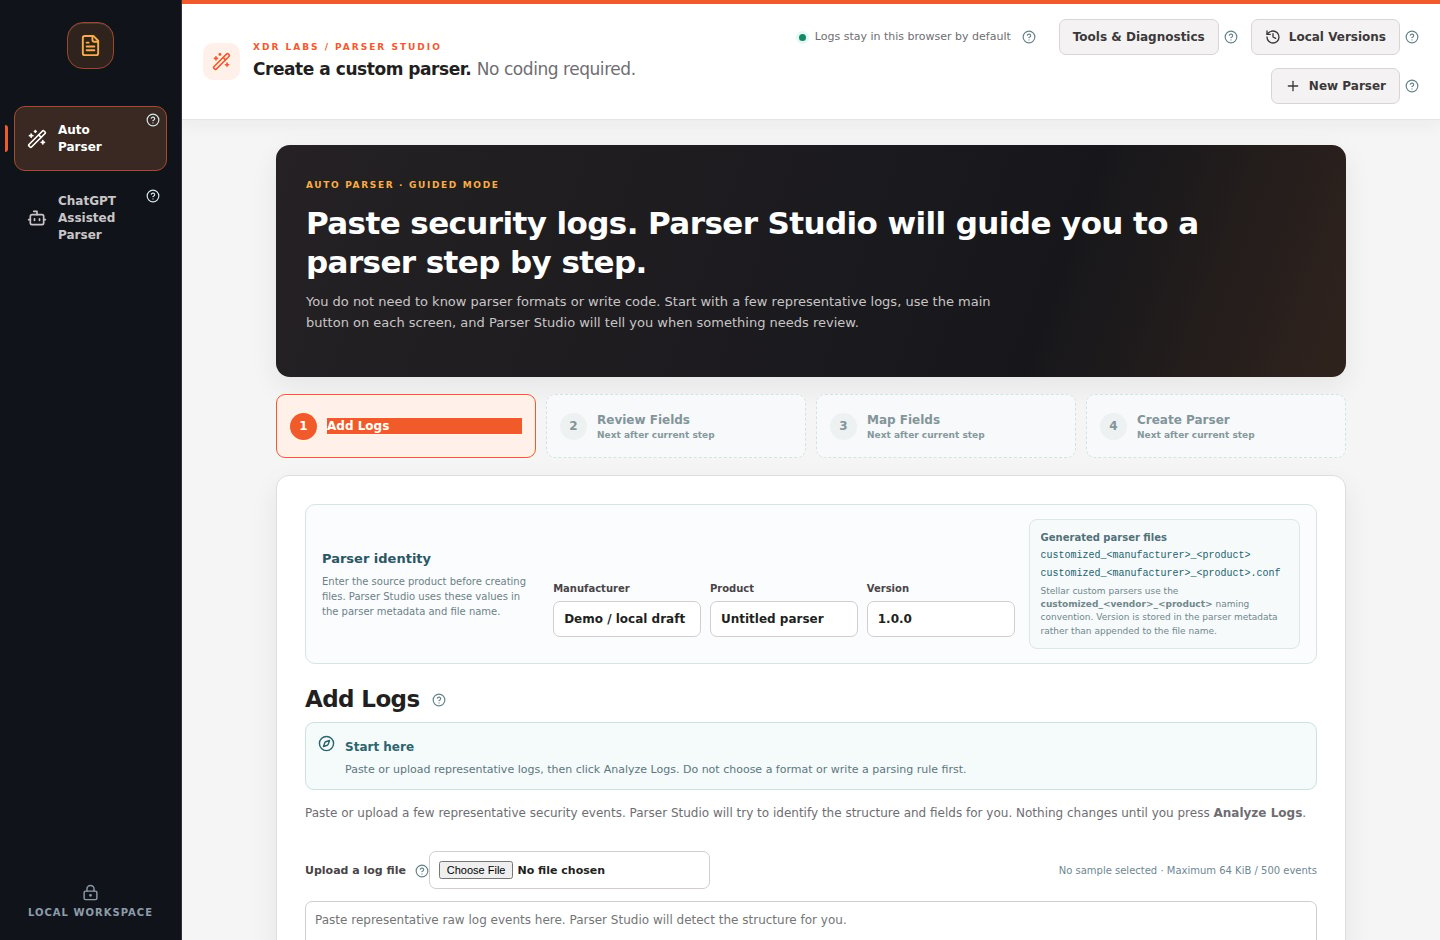
Step 2 — Paste the logs and analyze
Paste these two fictional events into the large box under Add Logs: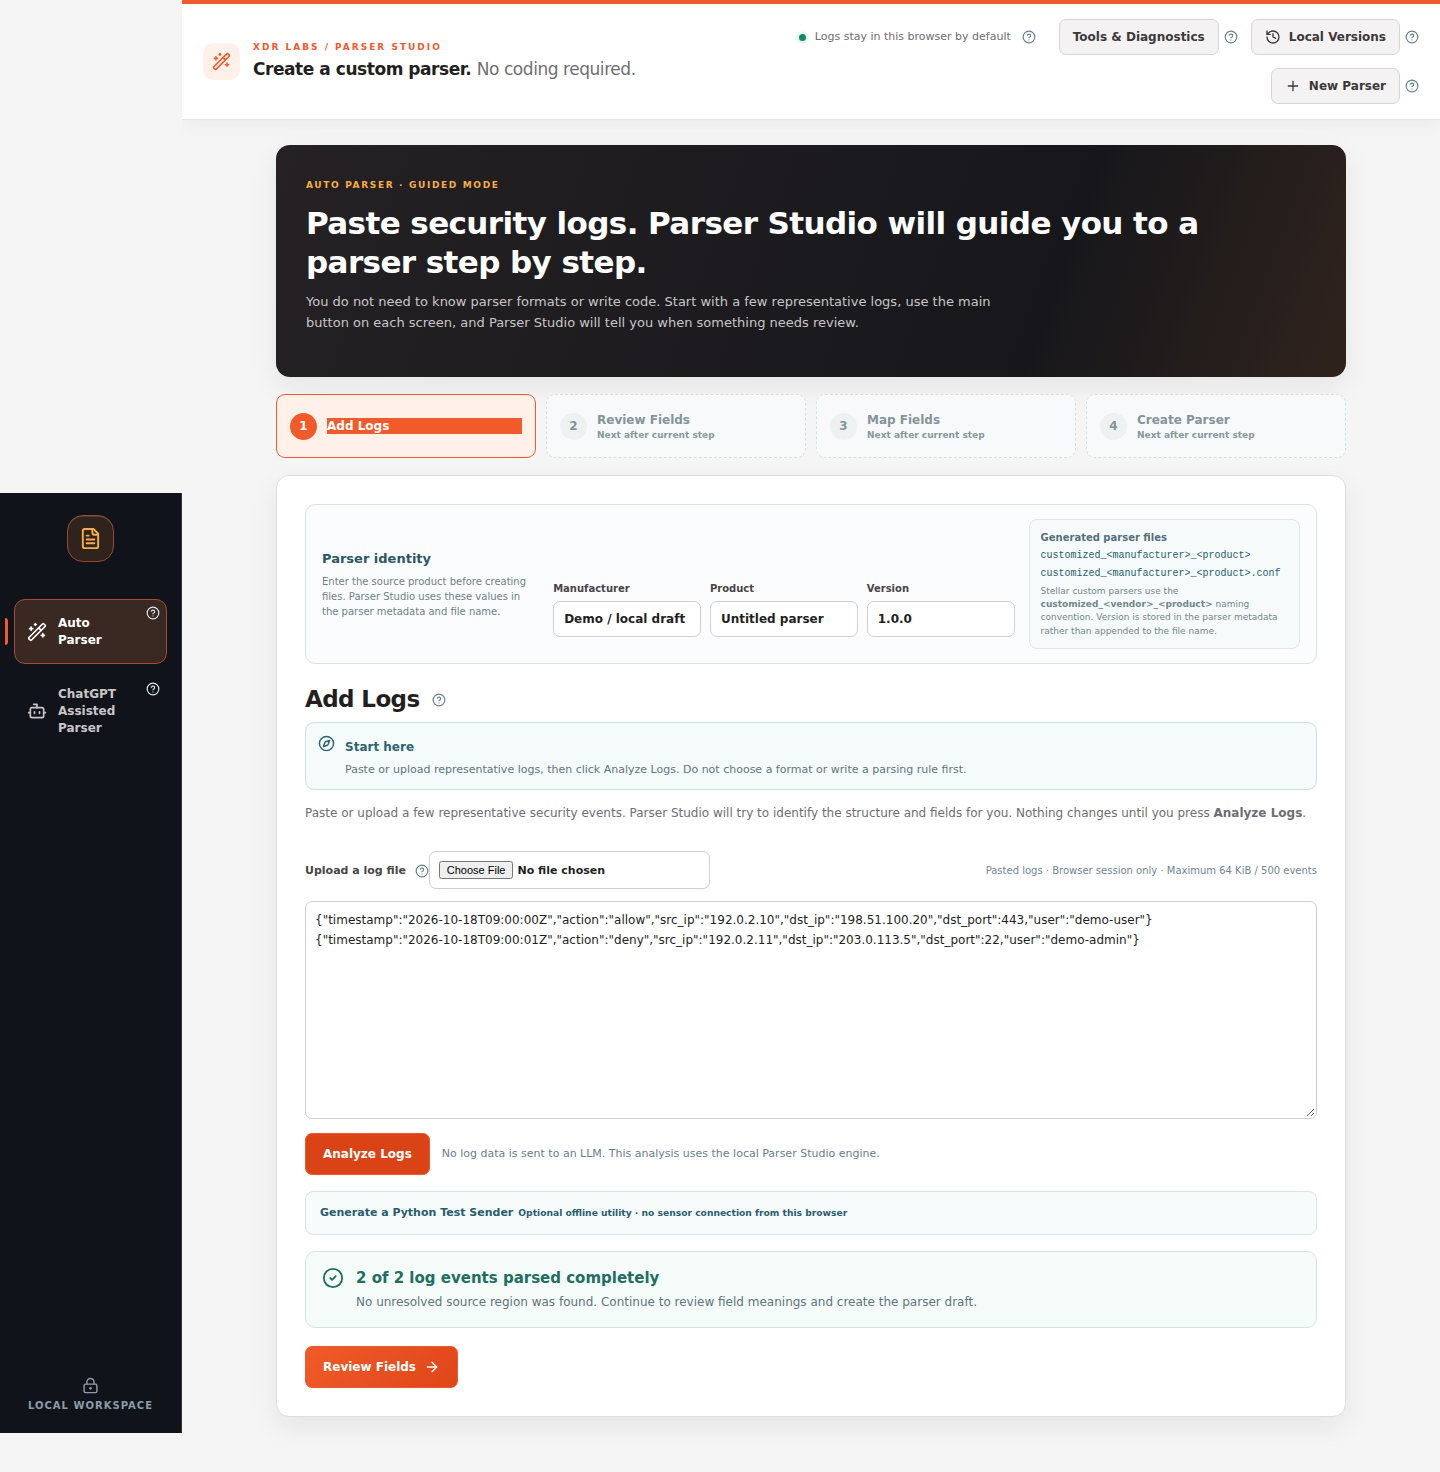
Step 3 — Check the values, then click Map Fields
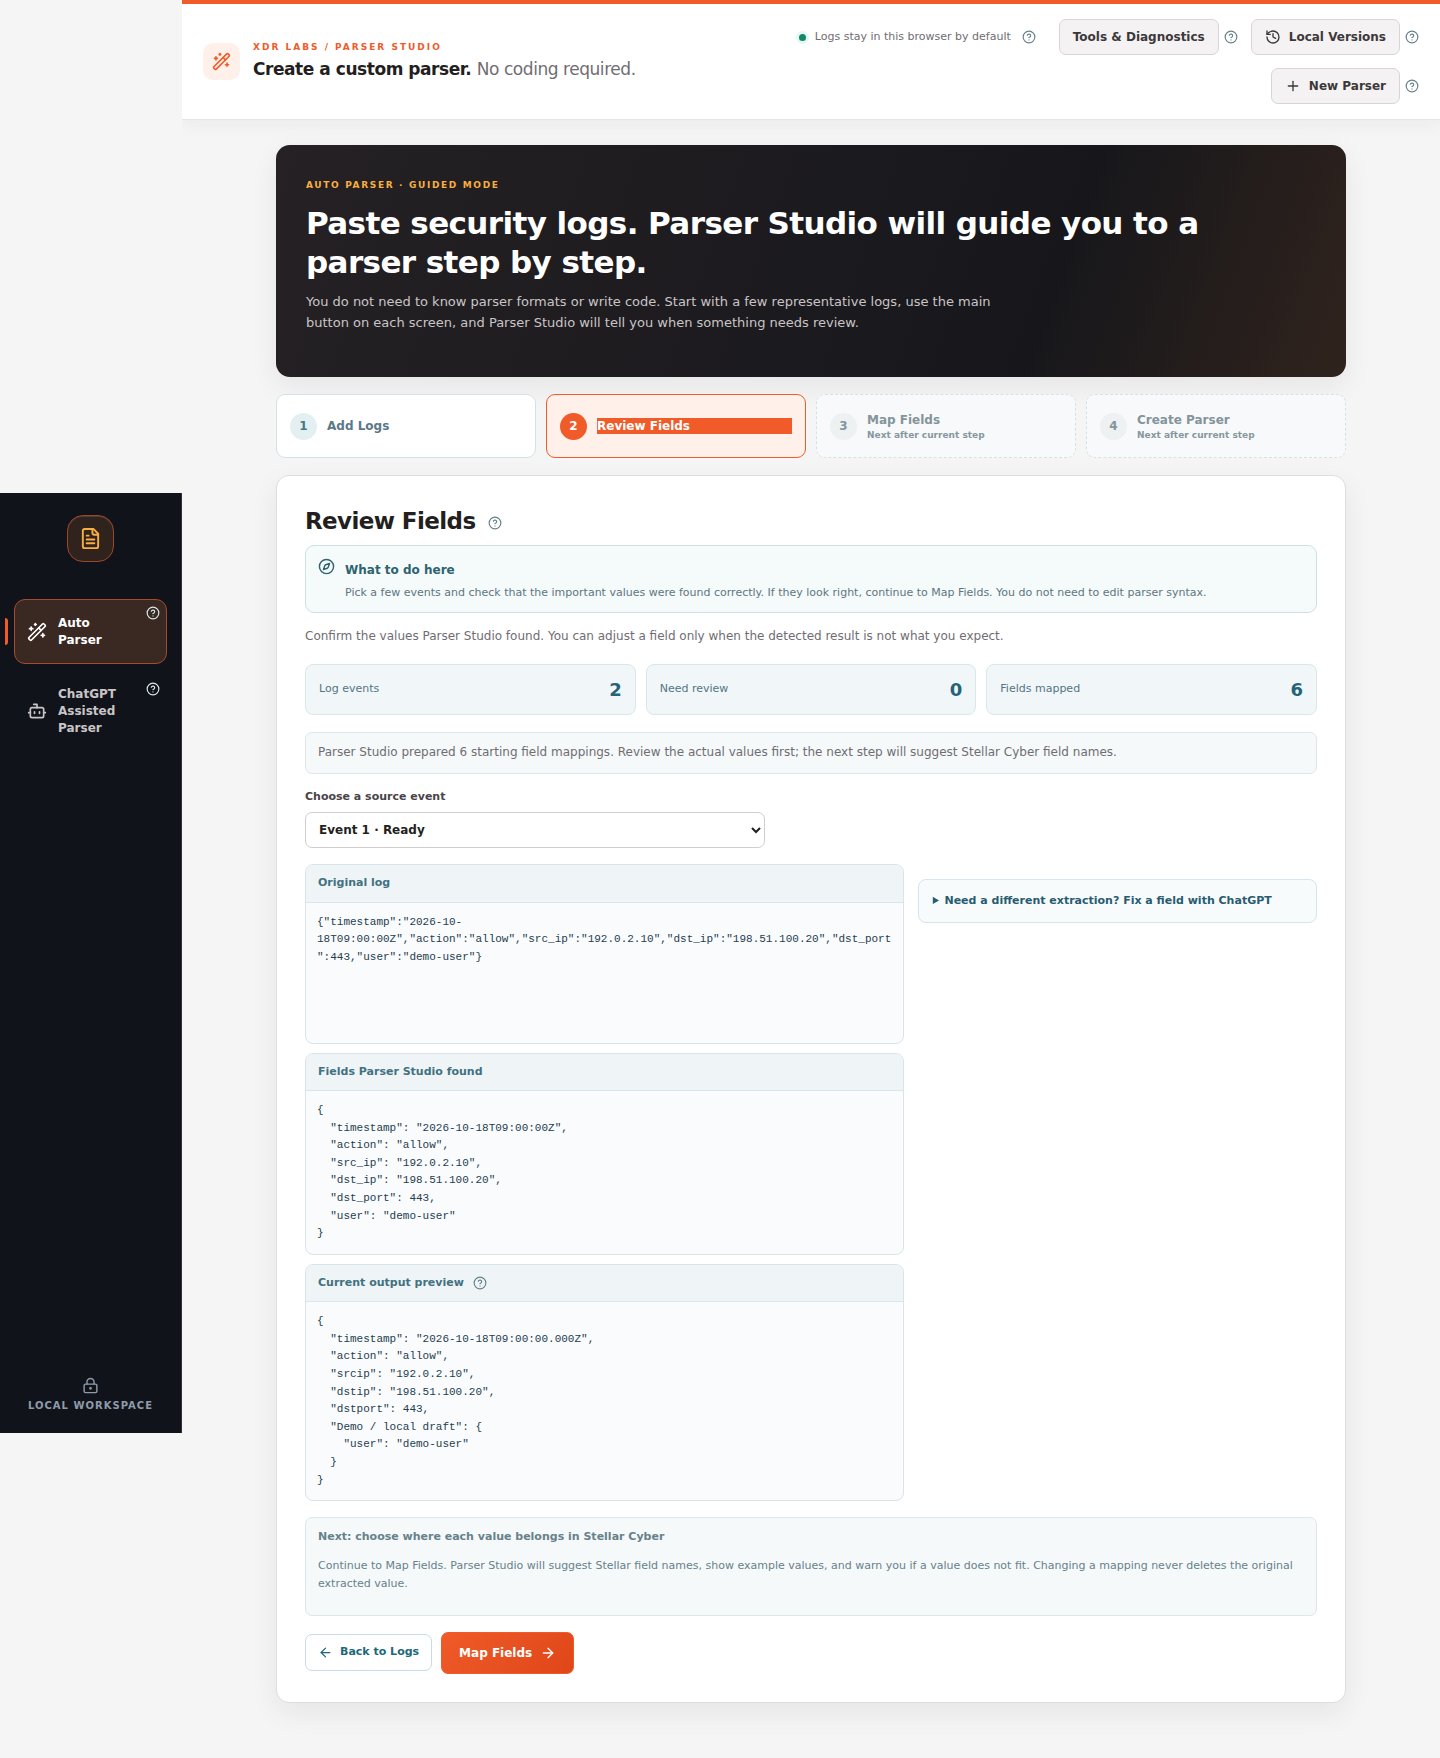
In Review Fields, use Choose a source event to examine both events. Check the three areas: Original log, Fields Parser Studio found, and Current output preview. For example, the source address192.0.2.10 should remain the source address in the parsed result.
If the extraction is correct, click Map Fields at the bottom. You do not need to repair a passing event.
Step 4 — Review suggested field names
On Map Fields, confirm that the address, action, port, and timestamp go to the intended output names. Most of the example fields are already matched. Check Must fix before continuing. If it shows 0 and the sample values make sense, click Create Parser.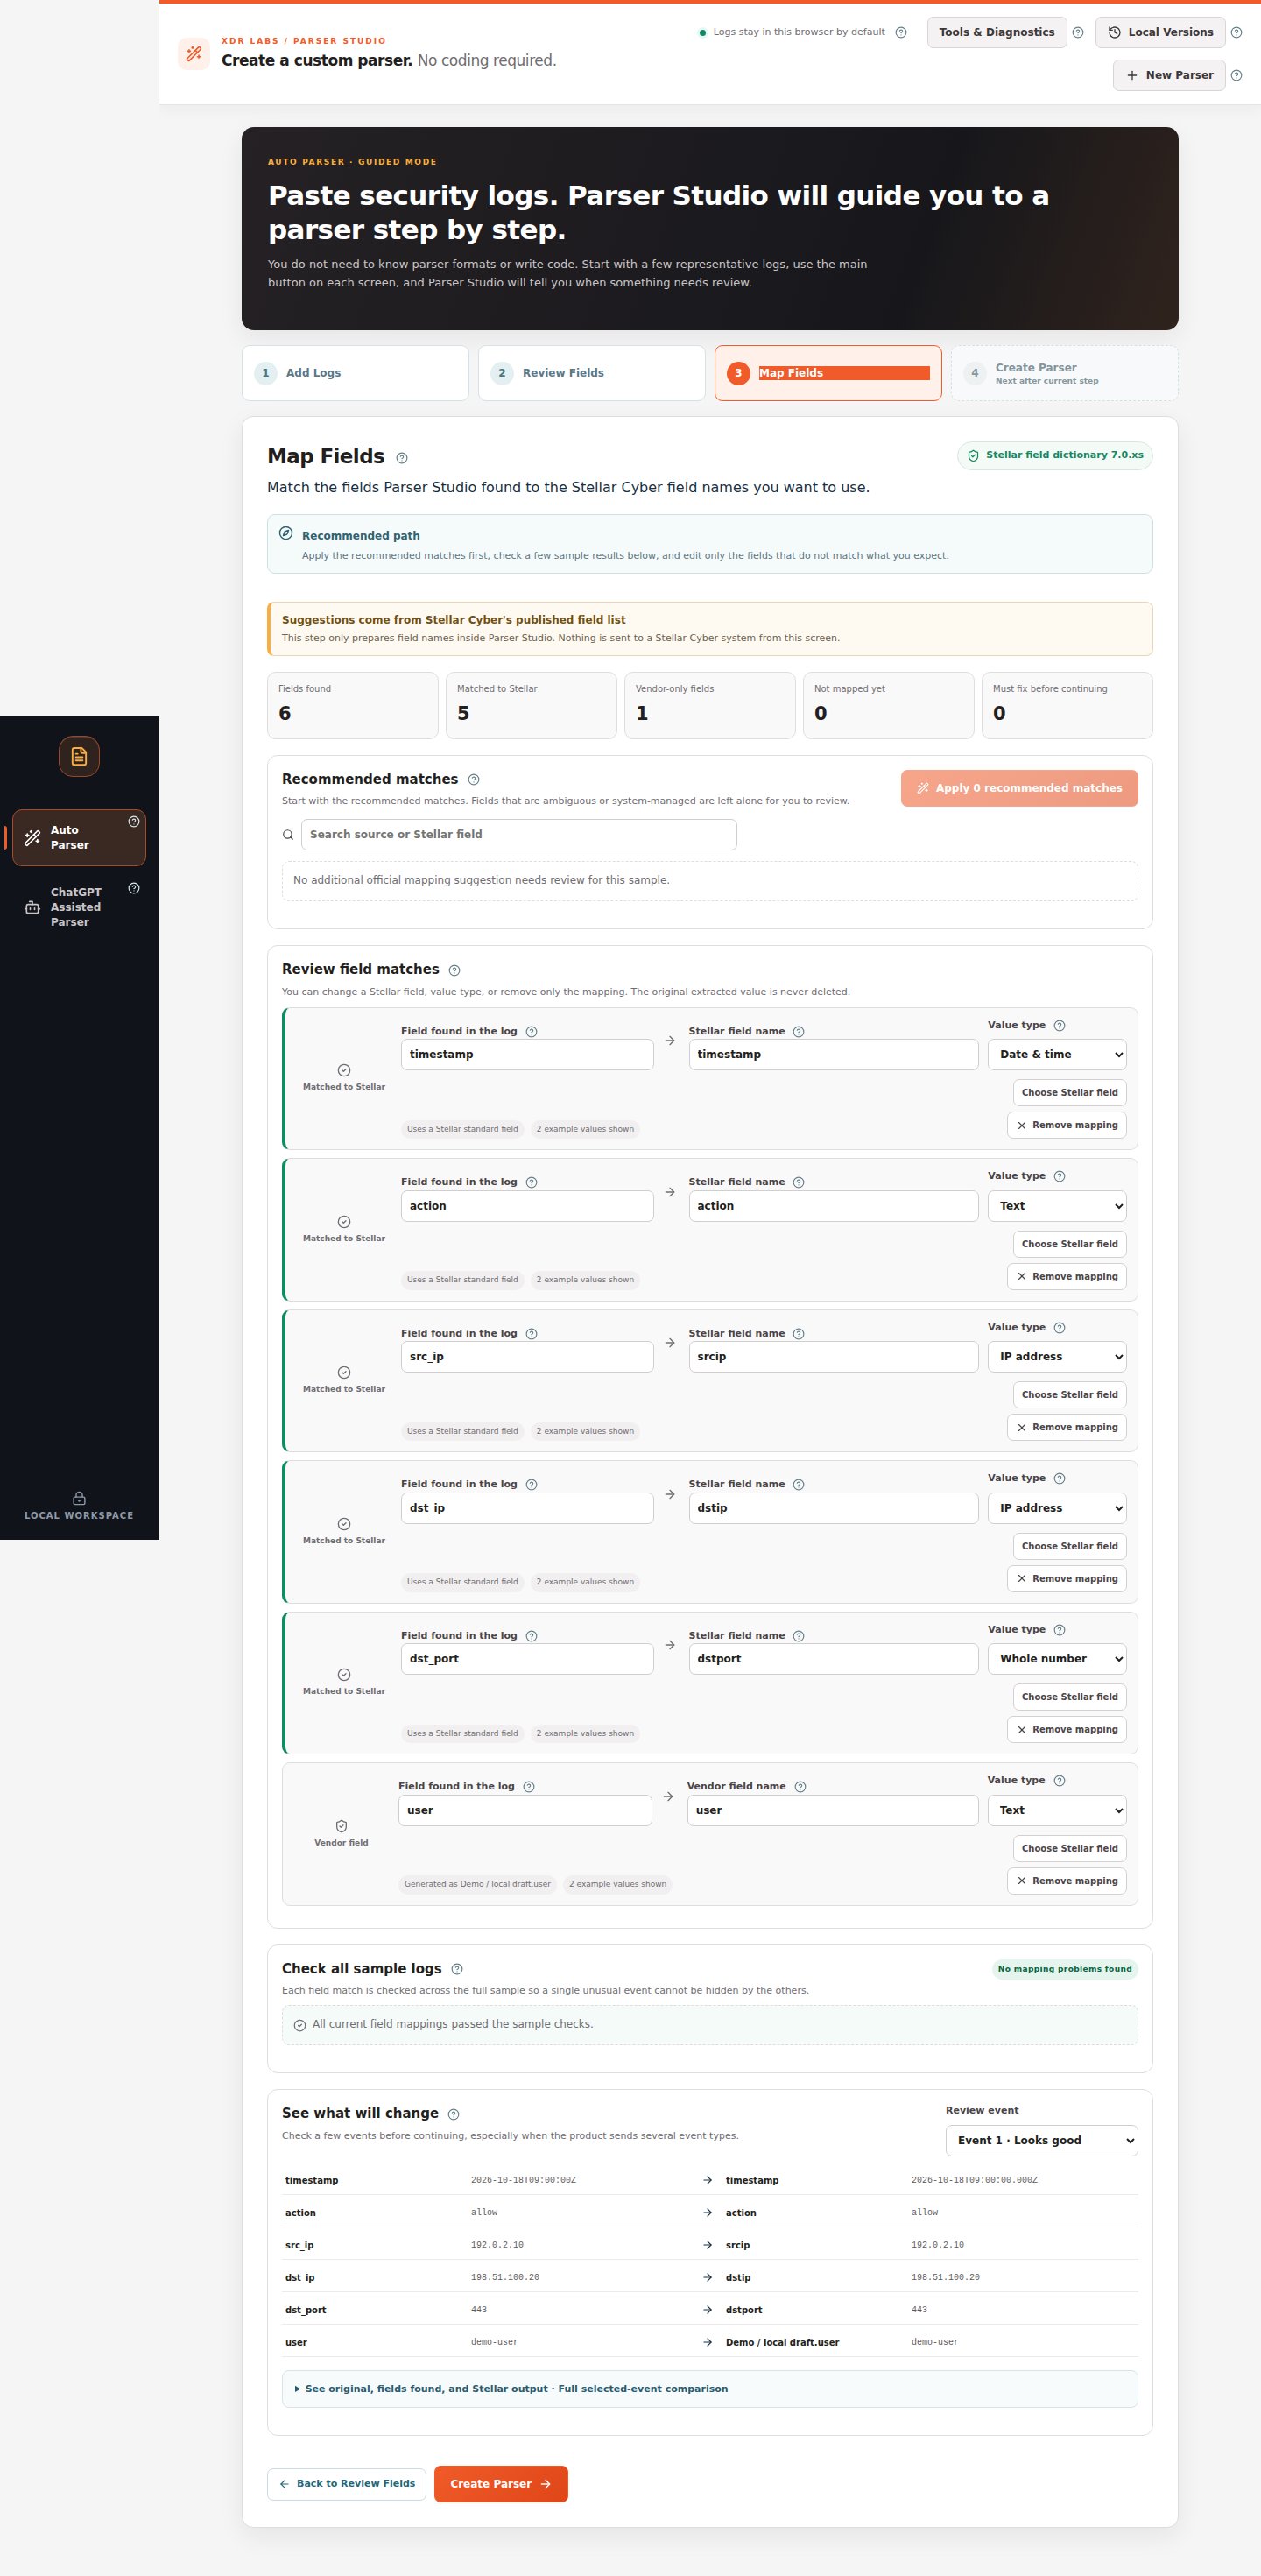
Step 5 — Run the final test and download
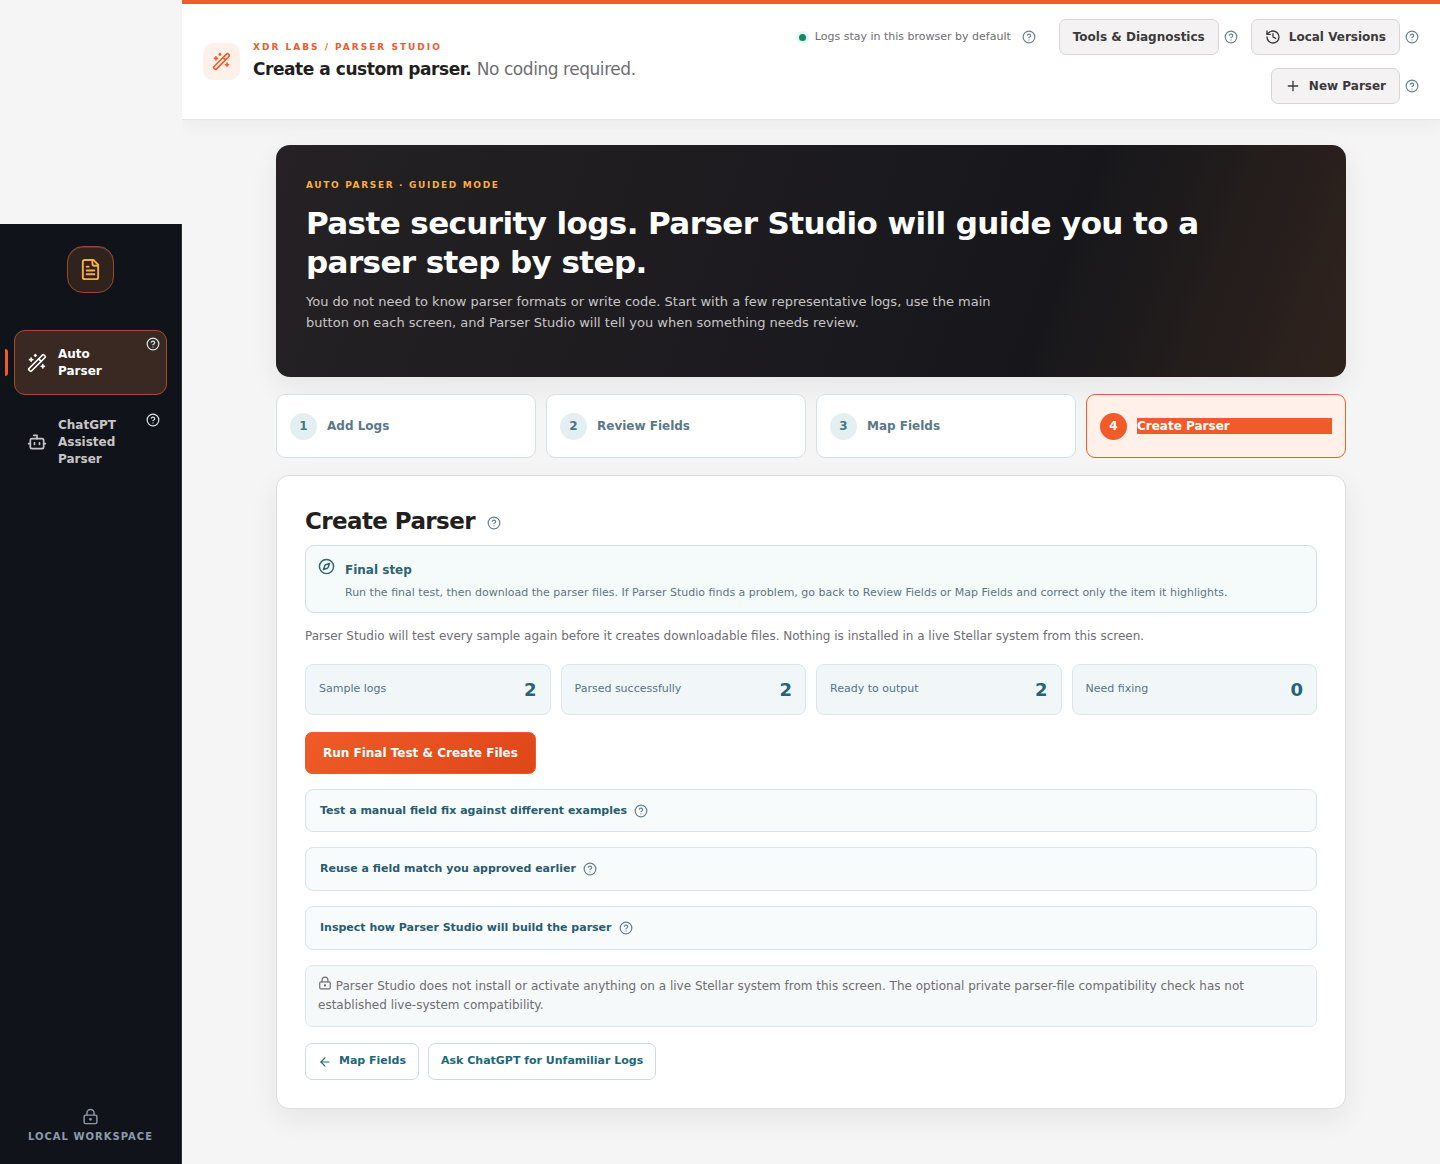
On the Create Parser screen:- Confirm that Need fixing is 0.
- Choose Run Final Test & Create Files.
- When the file generator completes its checks, download the Ruby parser logic and the companion CONF file; use the package option if available.
- Keep the files together with the sample and your reviewed mappings.
Which guide comes next?
A problem appeared
Find the incorrect event and use the suggested next action.
My product produces different messages
Learn how to review several event shapes without losing a log.