

Auto Parser: the normal way to create a parser
You do not need to recognize the format or write parsing expressions. Begin with a few complete examples of the product’s logs and work through the four visible stages.1. Add Logs→2. Review Fields→3. Map Fields→4. Create Parser
1. Add Logs — just paste and click Analyze Logs
- Select Auto Parser in the left menu.
- Optionally fill in the source Manufacturer, Product and Version in the Parser identity area. Confirm these before creating files.
- Paste a few full source events into Add Logs, or choose Upload a log file for a small text file. The screen shows a maximum of 64 KiB / 500 events.
- Click the orange Analyze Logs button.
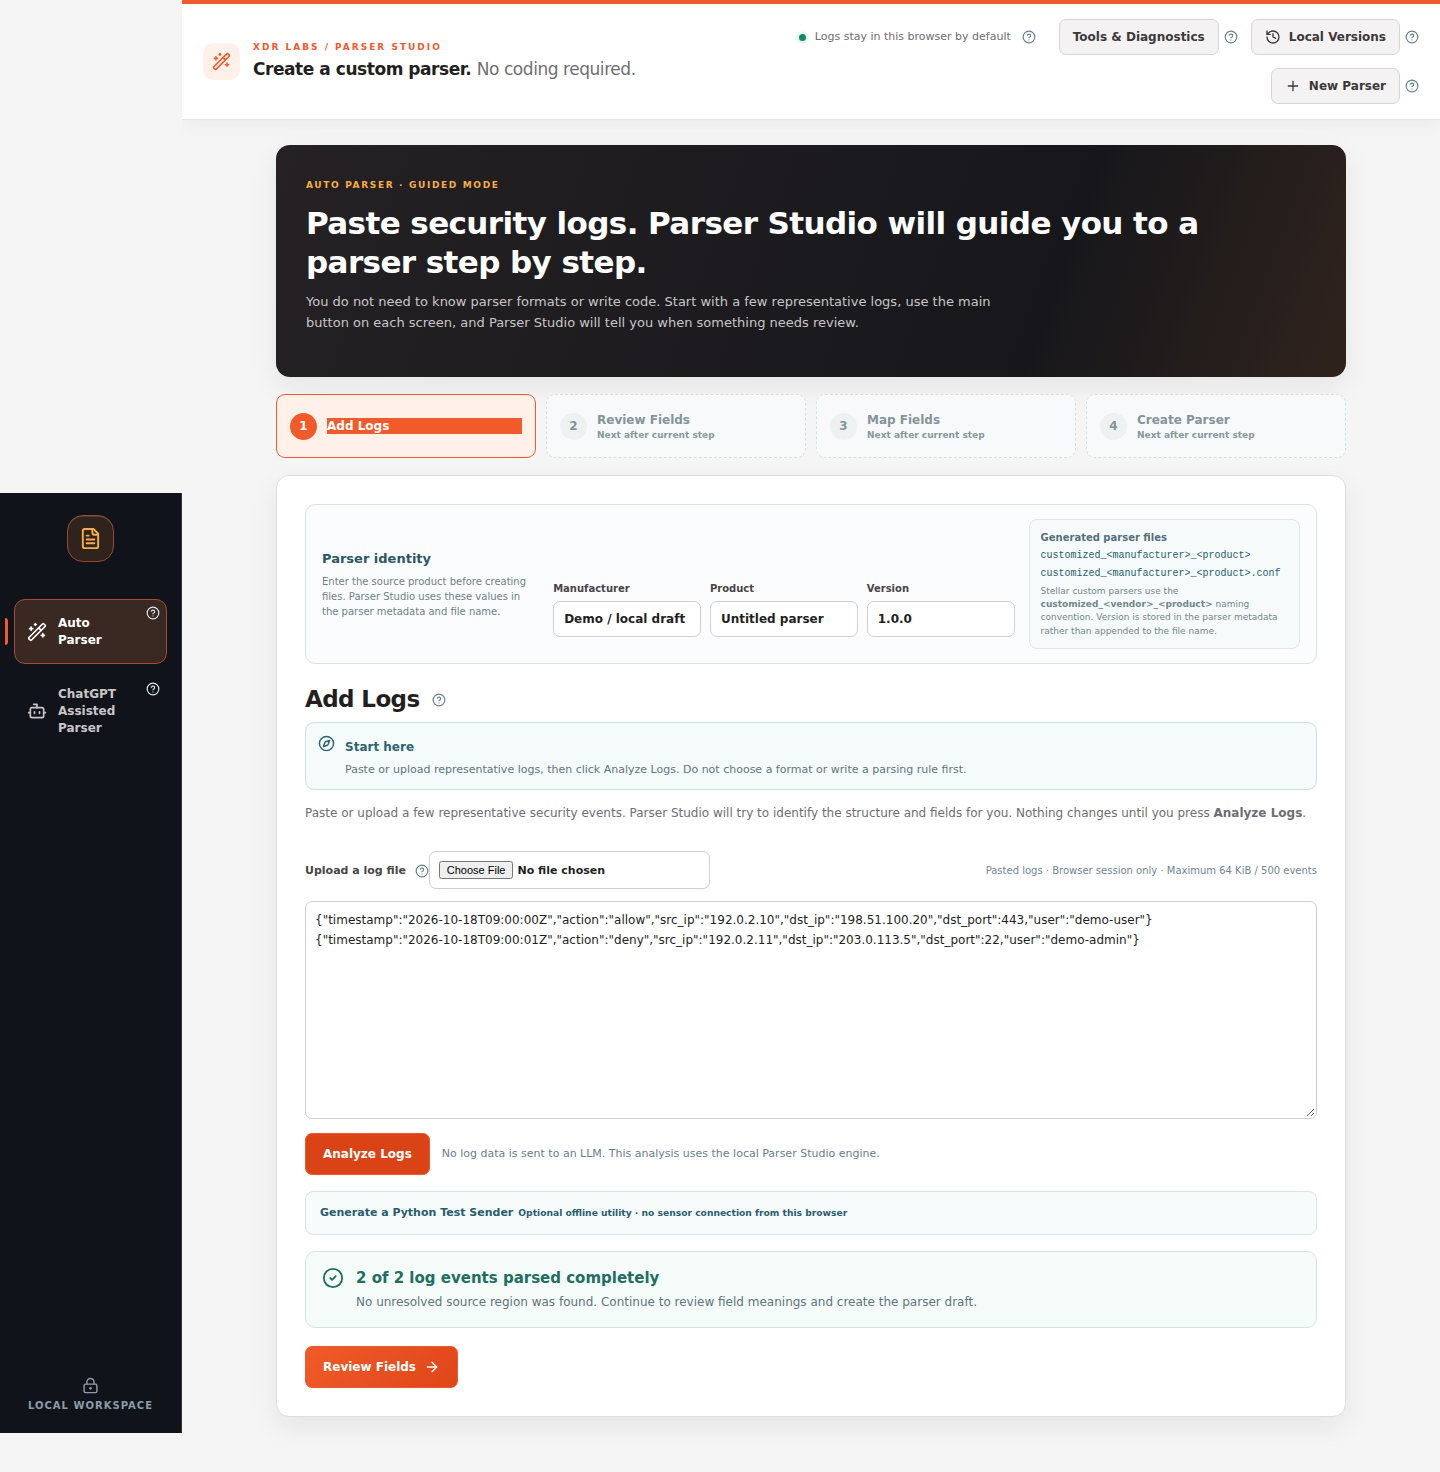
2. Review Fields — confirm what was extracted
Click Review Fields. Use Choose a source event to compare the Original log with Fields Parser Studio found and Current output preview. Inspect ordinary and unusual events. If values are correct, choose Map Fields at the bottom.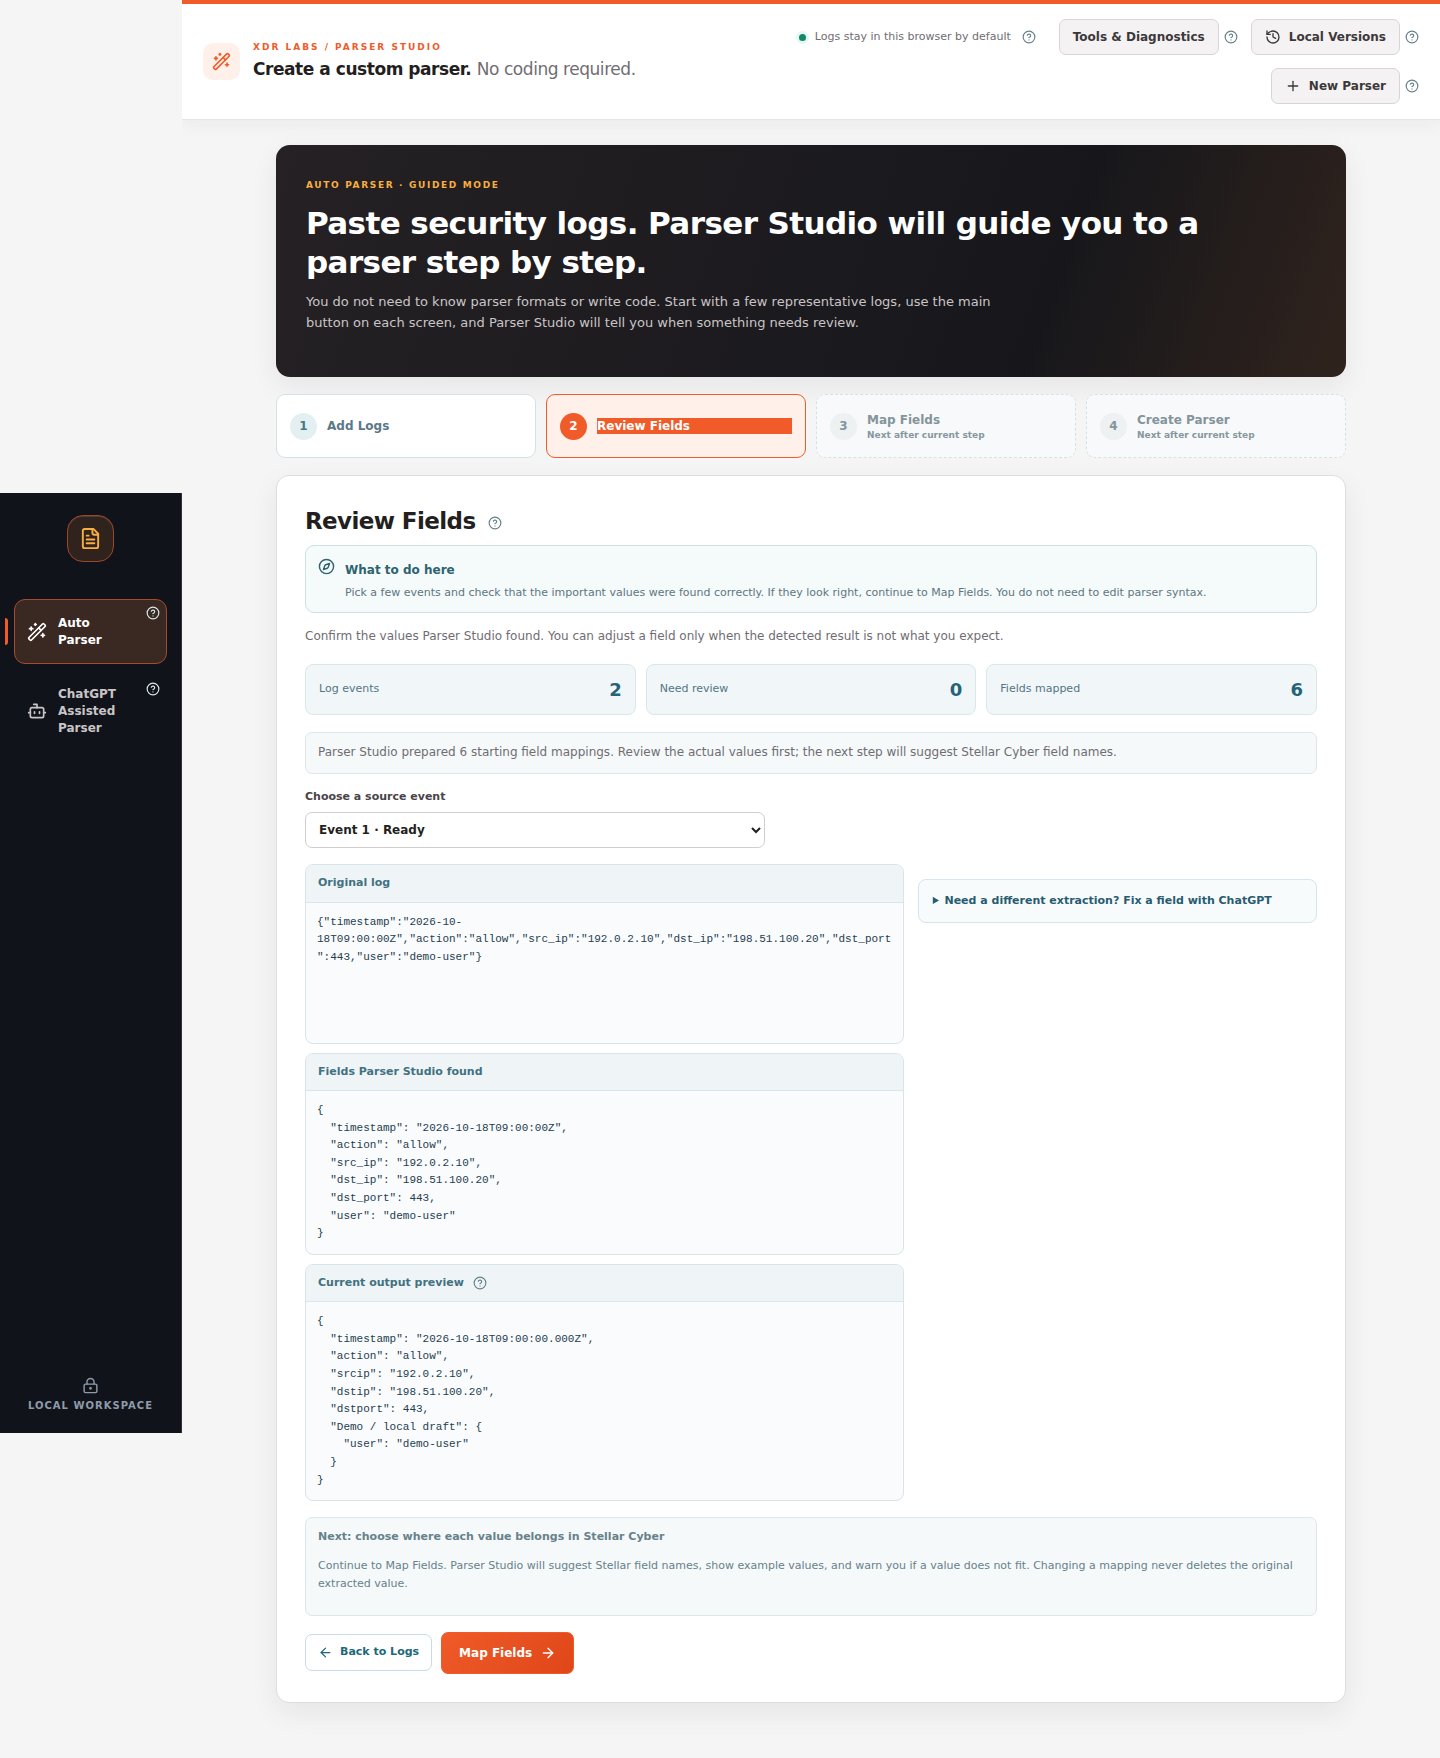
3. Map Fields — confirm names and value types
Check each important field’s source value, suggested Stellar field name, and Value type. The Must fix before continuing count should be 0. Apply recommended matches only where their meaning is correct. If everything is fine, choose Create Parser.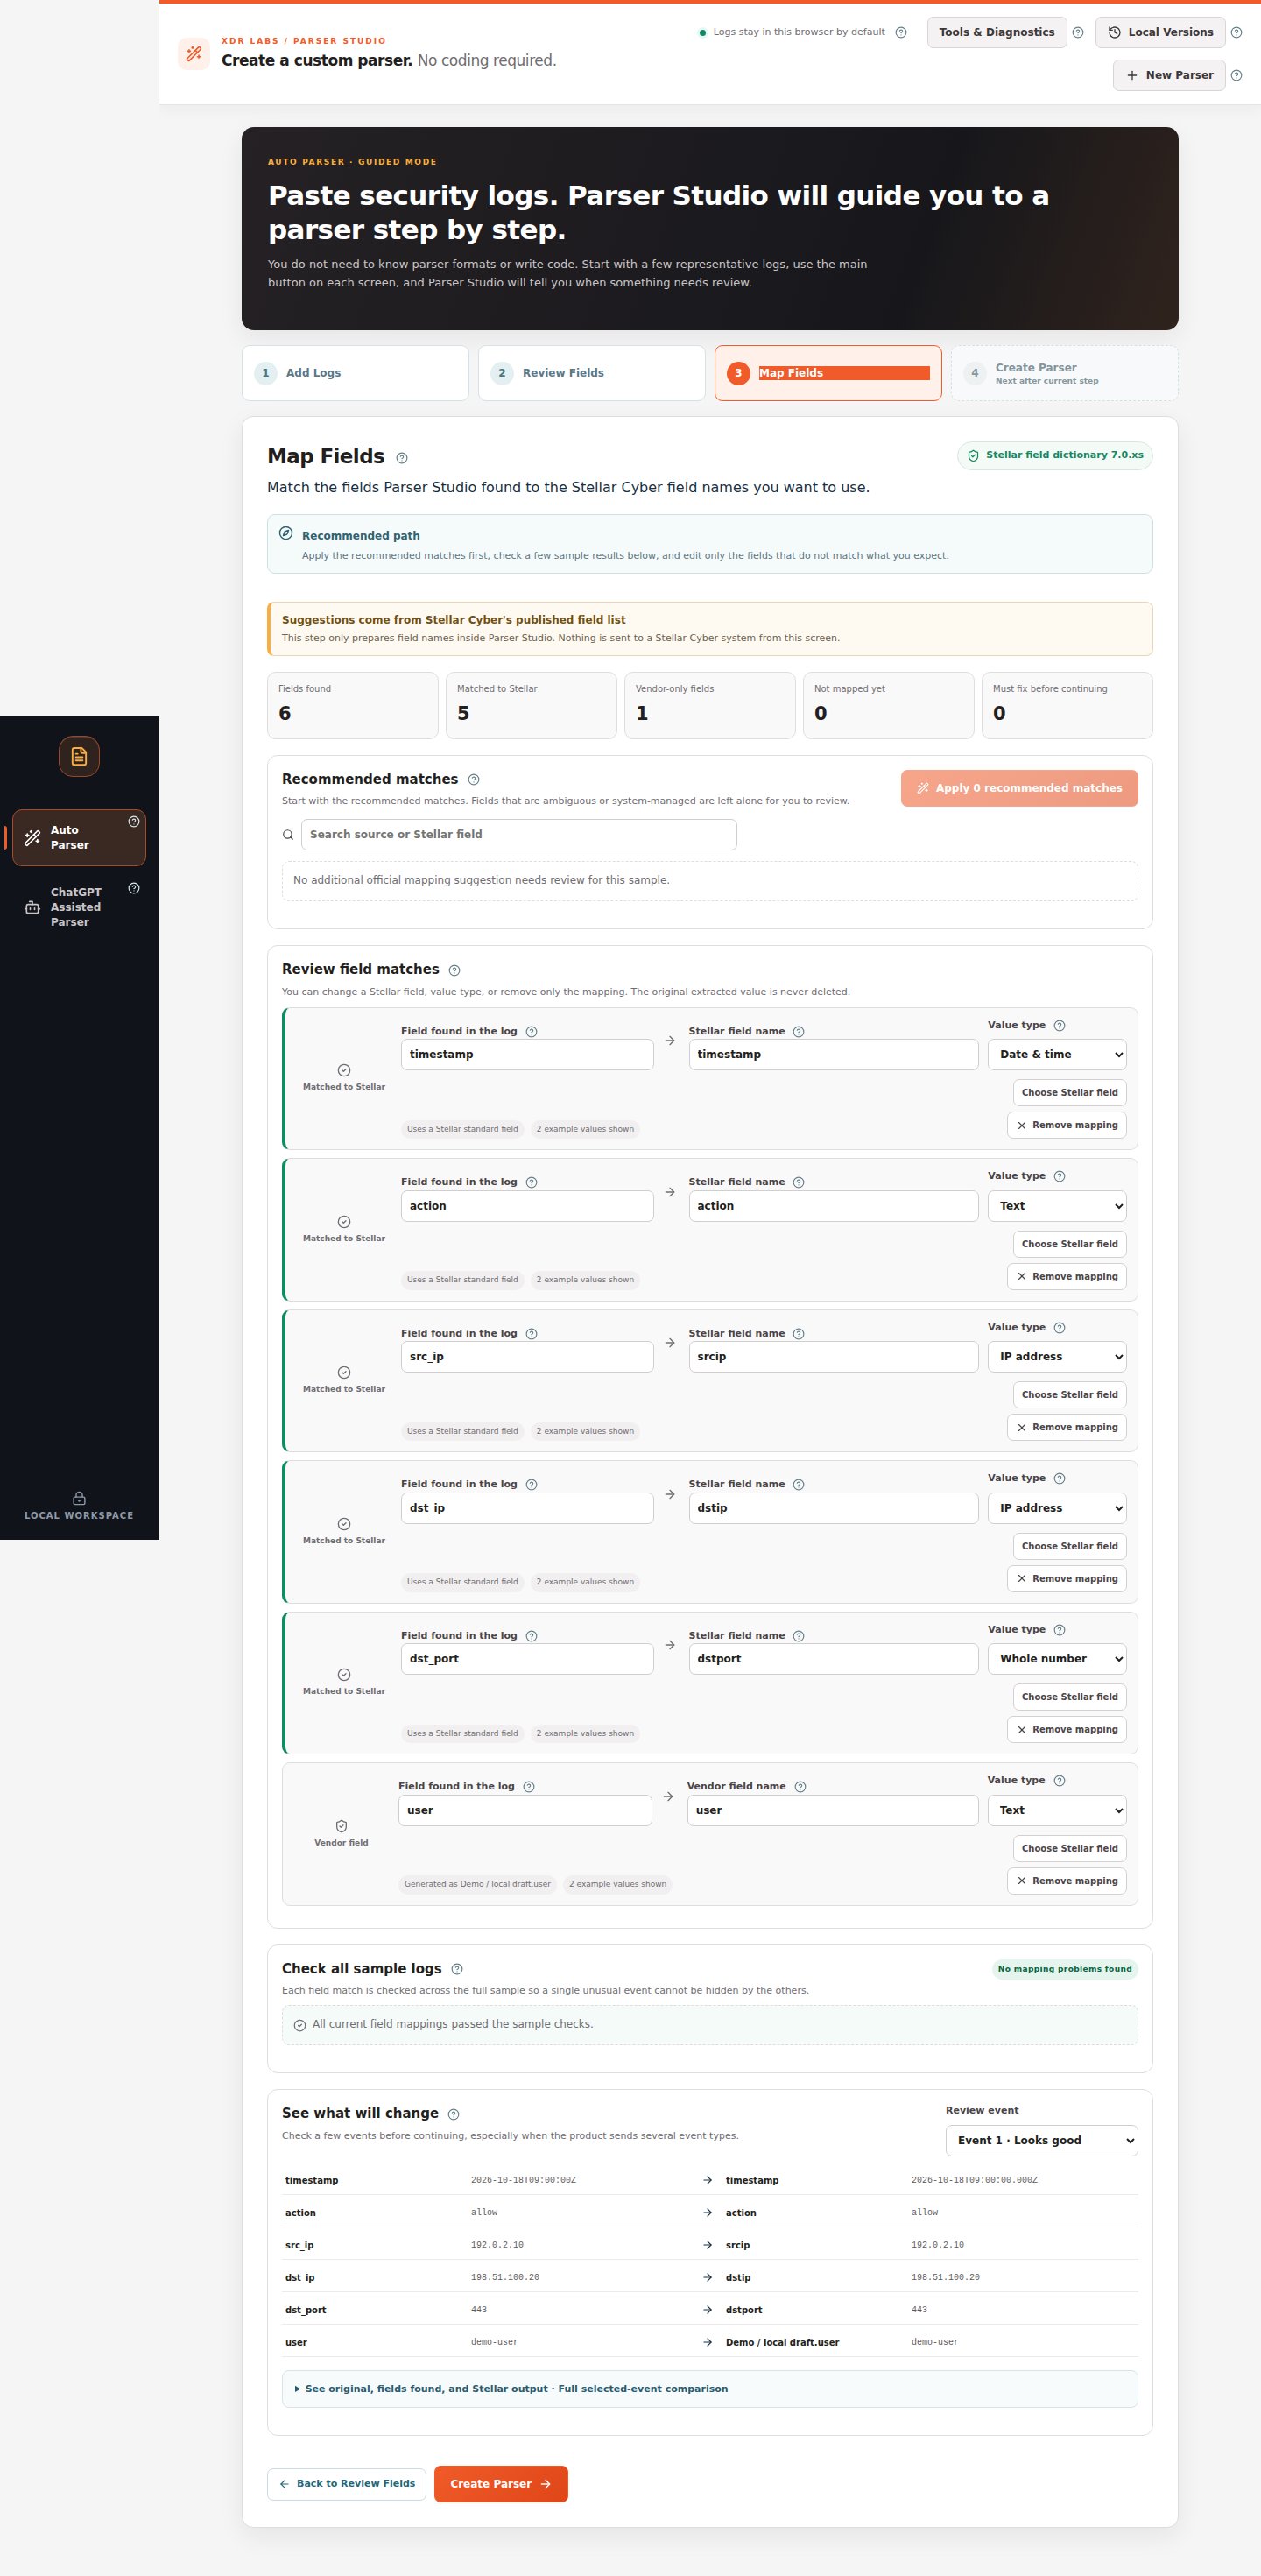
4. Create Parser — final test and download
Confirm Need fixing = 0, then click Run Final Test & Create Files. If the generator succeeds, download the generated Ruby parser logic and CONF files together. If the generator is unavailable or rejects a rule, the screen will not present a verified output—return to the indicated step.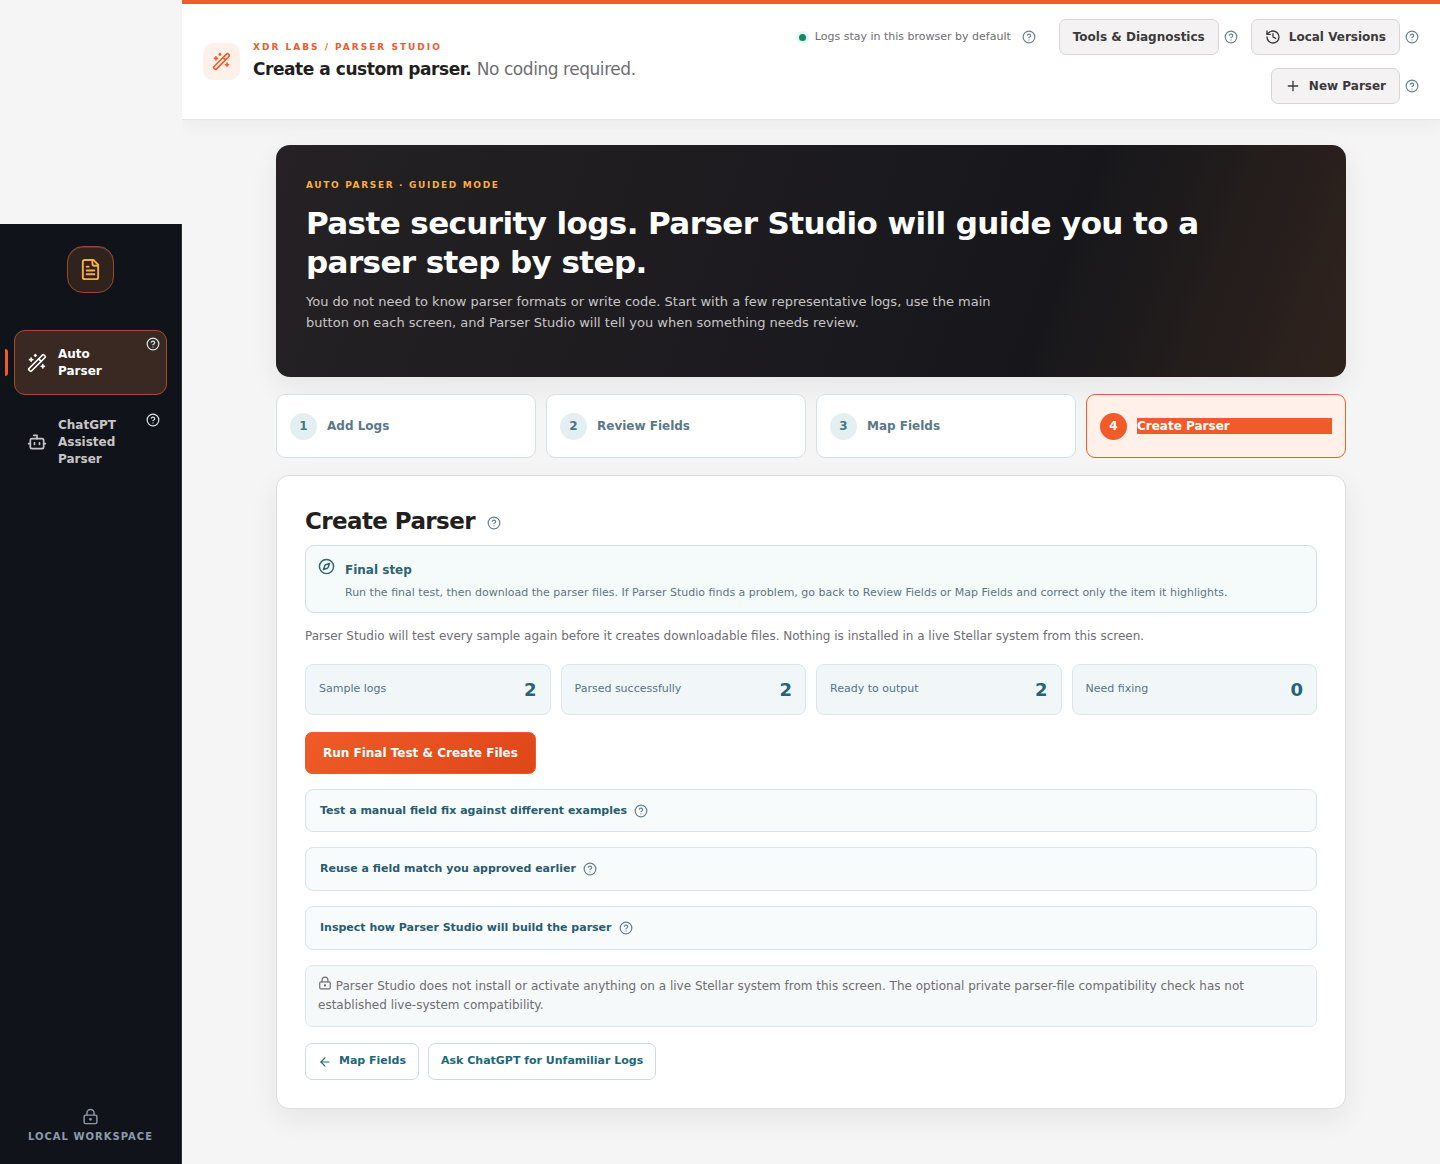
Use Tools & Diagnostics only when you need more information than the normal result provides. It is not required for a passing parser.
Still having trouble?
Some text is missing
Use the highlighted section and the recommended repair.
Not understood at all
Prepare a manually reviewed ChatGPT prompt.
The product sends several log types
Check all event families before making a combined parser.
Cannot create or download files
Understand final-test and service errors.